Looking to make a delicious hard cider at home? You have come to the right place! Run through this simple step-by-step cider making guide and learn how to make hard cider at home. It is a lot easier than you think!
Literally, hundreds of variables can affect cider making, from the apples and their growing region, soils and weather they were grown in, to the natural or cultured yeast that metabolizes the sugars in the juice.
Luckily, cider making can be as complex or a simple as the Cider Maker desires, and the variables listed above simply make for exciting experiments. Don’t be afraid to try something new and have fun with this delicious drink!

Table of Contents
Lets Talk about Apple Juice for Making Hard Cider
Apple Juice, Cider, Sweet Cider… Confused already? The term for the juice of apples can be referred to in several ways and can be confusing. In the US, we often call it apple juice when it is purchased from a store and filtered, cider when it is fresh from an orchard and unprocessed, and the fermented product is called hard cider. In many other parts of the world, cider refers to both sweet and fermented juice. In this section, I will be referring to the fresh, sweet, and unfermented juice.
Three main types of sweet apple juice:
- Fresh Pressed Cider at Home
- Fresh Pressed Orchard Cider
- Commercially Produced or Store Bought Juice
For cider making recipe, I suggest using fresh orchard pressed cider. This can be substituted with fresh pressed apple juice, store bought apple juice or even concentrates as long as the juice is preservative free. Different juice mixes will result in vastly different finishes.
Like wine, the quality of your fruit will determine the quality of your finished product. But, sometimes it is not seasonally available or not affordable and that is totally fine, you can still make a great drink!
Five Essential Pieces of Equipment


Clean & Sanitize all Brewing Equipment
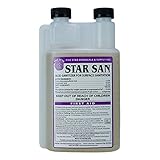
To make sure your apple juice doesn’t become compromised by funky bacteria or mold, it is very important to carefully clean and sanitize your brewing equipment. Start by washing your equipment with a brewing cleanser such as PBW by Five Star.
Once your equipment is clean, it’s time to sanitize! The easiest way to sanitize equipment is to use a no-rinse, food-safe sanitizer such as Star San . Simply mix one fluid ounce with five gallons of water and soak your equipment in the solution. The nice thing about using this sanitizer is that no rinsing is required. Quick and simple!
Make sure to use Star-San on anything that will come in contact with your cider such as the carboy, spoons, siphon, etc. The Star-San solution is also effective for about 30 days after mixing so don’t pour it down the drain just yet!

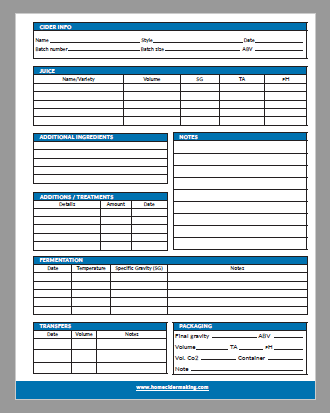
Measure Specific Gravity of the Cider
A hydrometer reading is an easy way to measure the specific gravity (SG) or sugar content of the sweet apple juice. This reading will allow you to calculate the potential alcohol that could be produced. More sugar, more alcohol (to a point).
The initial reading is called the original gravity (OG). This measurement will also be taken during fermentation to see how well the cider is fermenting and after fermentation to measure the final gravity (FG). The OG and SG are used to calculate final alcohol by volume.
How to take a hydrometer reading:
- Fill a test cylinder with a sample of cider
- Place the hydrometer into the sample and give it a slight spin
- Take reading where the meniscus intersects the scale
- Document the specific gravity reading on a Cider Log
- Discard or consume the sample; do not pour it back into the main fermenter
Do You Need Campden?
Note: If you are using pasteurized juice, you can skip the campden all together. Pasteurization will have already killed the wild yeast.
Fresh pressed apple cider will naturally contain wild yeast. Wild yeast is unpredictable and may give off flavors to your finished beverage or make incredible natural hard cider by itself; its a gamble.
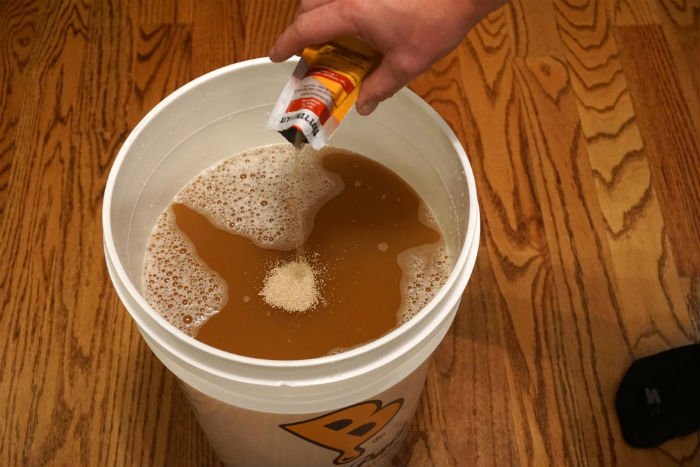
To ensure good fermentation I suggest using a cultured yeast so you have predictable results when getting started. To prepare the must for a cultured yeast, add campden tablets to stun the wild yeast to ensure the cultured yeast can thrive.
To do this, pour the apple juice into your fermenter or food safe bucket and add one crushed campden tablet per gallon of juice. Then, cover the container with a cloth so it can breathe, but also keep bugs and other debris out.
Do not attach an airlock at this point as the SO2 gasses created by the campden tablets need to escape after it does its job. Allow the campden tablets to work for a minimum of 24 hours and gently stir the juice a couple of times during this period with a sanitized spoon or by swirling the fermenter.
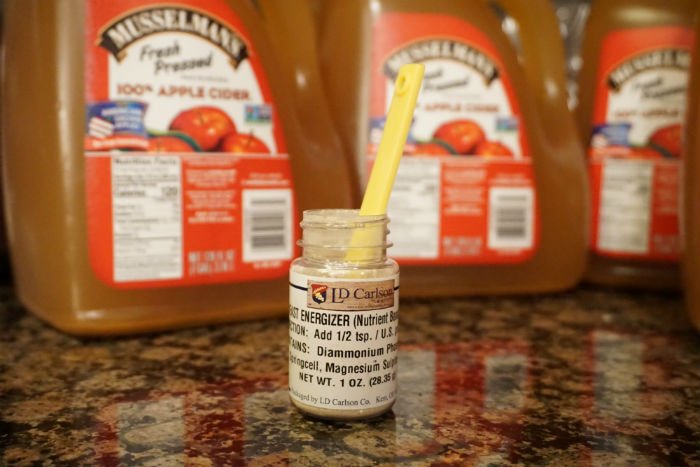
Yeast Nutrients and Pectic Enzyme
Apple juice, depending on the blend, is typically deficient in some nutrients that yeast needs to thrive. Yeast nutrient will help them flourish and ensure a strong fermentation which reduces off flavors and fusal (bad) alcohol production. For more information, read the yeast nutrient post. LD Carlson yeast nutrient suggests adding 1/2 tsp. per gallon of must.
If you would prefer a visually clear beverage at the end, consider adding a pectic enzyme at this point. Although it will not change the flavor, the enzyme will break down the natural pectins and help produce a nice clear cider.
LD Carlson pectic enzyme suggests adding 1/2 tsp. per gallon of must before fermentation begins.
Note: When using most commercially made apple juices, the pectins have already been removed to produce a clear and visually appealing product. If the juice is already clear, pectic enzyme will not be needed.
Filling the Fermenter and Pitching Yeast
Woo, there was a lot of prep work to get to this point but now we can finally start making something.
If you choose to add yeast nutrients or pectic enzyme, now is the time to add them to the fermenter. I like to have them in the fermenter before the juice is added so they are mixed thoroughly when the juice is poured in.
Now, pour the juice into the fermenter and allow it to splash around a bit. Introducing oxygen at this point is vital as the yeast needs it to thrive.
Once the fermenter is full and any other additions have completed their process (campden) it will be time to pitch yeast.
The process of adding the yeast to the juice is called “pitching”. To pitch the yeast, pour in the recommended amount right on top of the juice.
When first learning how to make hard cider, I suggest using Cider House Cider Yeast . This yeast has been developed specifically for fermenting cider and it comes premixed with a yeast nutrient.
If you decide to use another yeast for this recipe (there are endless choices!), read the directions on the label for the best results, and consider adding a separate yeast nutrient.
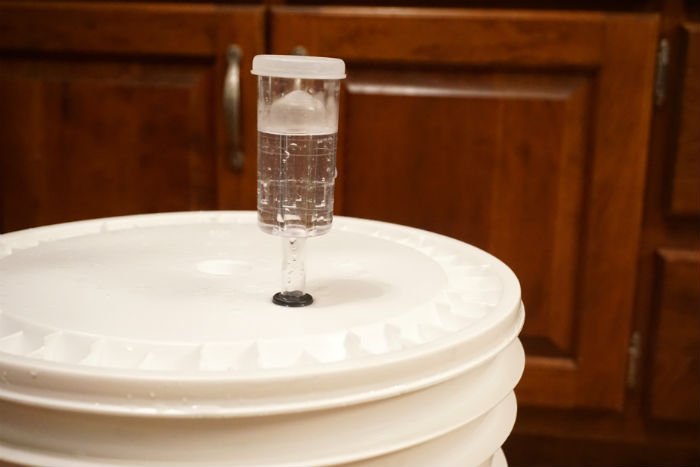
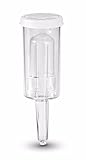
Time For The Airlock and Fermentation
The airlock is what keeps the good in and the bad out. Carefully sanitize the airlock and stopper before attaching them to your carboy. Then, fill the airlock to the “fill line” that should be printed on the side. Don’t forget to keep this full during fermentation!
Fermentation should begin within 24 hours and continue for about two weeks depending on the sugar content and temperature. A room temperature of 60F-70F is optimal.
Once the airlock has stopped bubbling for about 2 days it is time to take another specific gravity reading. The gravity should be around 1.002-0.990 depending on the recipe and yeast that was used. Record this measurement and wait for two more days before retesting again. If the reading is the same, fermentation is complete.
Note: Bottling before completion may cause the bottles to explode!
Once all of the fermentable sugars have been consumed and fermentation has halted you need to rack your cider. “Racking” means to transfer the cider from one vessel to another to separate the liquids from the solids.
To do this, use a siphon to transfer the fermented cider from the primary fermenter into another vessel without transferring the sediment (referred to as Lees) that has settled on the bottom during fermentation. Racking the cider will separate the liquid from the Lees which is made up of yeast and apple sediment and makes it easier for the now fermented apple cider to clear while aging.
Bottle and Carbonate
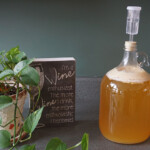
Once fermentation has ended you can now get ready to package the cider. Of course, you could drink the cider right away, but bottling or kegging will make it possible to add carbonation and allow flavors to develop just like a fine wine.
There are a few things you need to consider before moving on. First, you need to decide if you want a still or carbonated hard cider. If you prefer still, without carbonation, just bottle it up and give it time!
To carbonate, the general rule of thumb is to add one ounce of priming sugar per gallon of cider. But, this calculation is very important as too much sugar will cause the bottles to explode! So, I suggest using the priming sugar calculator to accurately figure the amount of priming sugar needed.
To ensure the sugar completely dissolves and mixes evenly, boil a small amount of water and dissolve the sugar into it. Then, add the sugar solution to your bottling bucket and rack the cider on top of the sugar. This will mix the priming sugar and the cider without stirring in excess oxygen.
The bottles should be stored out of sunlight in a cool place ranging around 55F-65F. After about two weeks, the bottles should be properly carbonated.
Note: Back sweetening and bottling cider is a little tricky because the yeast will keep eating the sugars until the bottles explode. If you prefer a sweet hard cider, consider back sweetening the cider with a non-fermentable sweetener.
Age or Drink?
Once you make hard cider and your first batch is ready, the hardest part is waiting for it to age before drinking it. Although aging is not necessary, the young alcohol may be quite tart and boozy when fresh but ciders tend to become more flavorful and smooth with time.
Consider aging hard cider for a minimum of one month but keep in mind 3 to 6 months can improve the flavor of homemade ciders, especially those with higher ABV content. I like to test a bottle each month to see how they change!
Homemade Hard Cider Recipe
Materials
- 1 gal Apple Cider
- 1 tab Campden
- 1 tsp Yeast Nutrient
- 1/4 pack Safale S-04 Yeast
- Priming Sugar Optional
Instructions
- Clean and sanitize all cider making equipment before starting.
- Pour the Apple juice into the fermenting vessel.
- Take a hydrometer reading to measure the original gravity and record.
- Add Campden if using fresh unpasteurized juice if desired. Wait 24 hours.
- Add yeast nutrient and pectic enzyme if desired.
- Pour the yeast into the fermenter.
- Close the fermenter and install an airlock filled with sanitizer.
- Allow the cider to ferment in a cool and dark place for about two weeks.
- Check specific gravity to make sure fermentation has ended.
- Cold crash, rack and bottle.